In this tutorial, we’ll explore how to generate barcodes in a Laravel 11 project. We’ll be using the picqer/php-barcode-generator package, a simple yet powerful tool for creating barcodes. By following the steps below, you’ll be able to add barcode generation to your Laravel app with ease.
We’ll go through examples of creating barcodes in different formats and saving them directly, as well as displaying them in Blade views.
Step 1: Set Up Laravel 11
If you haven’t set up a Laravel project, you can create a fresh installation with the command below. This step is optional if you already have your Laravel application.
composer create-project laravel/laravel example-appStep 2: Install picqer/php-barcode-generator
To generate barcodes, we’ll install the picqer/php-barcode-generator package. Open your terminal, navigate to your project directory, and run:
composer require picqer/php-barcode-generatorThis package allows us to generate barcodes in different formats, such as PNG images and HTML, for integration into views.
Example 1: Generate a Barcode as an Image
In this example, we’ll save the generated barcode image to the storage directory. This is helpful if you need to keep a record of generated barcodes for products or inventory.
File: routes/web.php
use Illuminate\Support\Facades\Route;
use Picqer\Barcode\BarcodeGeneratorPNG;

Route::get('barcode', function () {
    $generatorPNG = new BarcodeGeneratorPNG();
    $image = $generatorPNG->getBarcode('000005263635', $generatorPNG::TYPE_CODE_128);

    return response($image)->header('Content-type','image/png');
});
Visiting this route will generate a PNG barcode image, which will display directly in the browser.
Example 2: Generate and Save a Barcode Image
In this example, we’ll save the generated barcode image to the storage directory. This is helpful if you need to keep a record of generated barcodes for products or inventory.
File: routes/web.php
use Illuminate\Support\Facades\Route;
use Illuminate\Support\Facades\Storage;
use Picqer\Barcode\BarcodeGeneratorPNG;

Route::get('barcode-save', function () {
    $generatorPNG = new BarcodeGeneratorPNG();
    $image = $generatorPNG->getBarcode('000005263635', $generatorPNG::TYPE_CODE_128);

    Storage::put('barcodes/demo.png', $image);

    return response($image)->header('Content-type','image/png');
});
Example 3: Displaying Barcodes in a Blade View
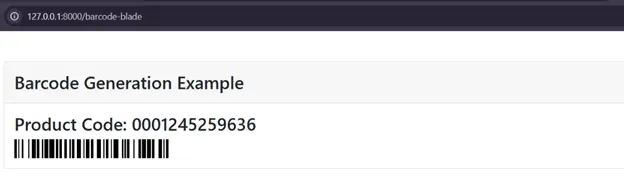
For applications that display product details, it’s often useful to include the barcode directly in the view. This example generates an HTML-based barcode and passes it to a Blade template.
File: routes/web.php
use Illuminate\Support\Facades\Route;
use Picqer\Barcode\BarcodeGeneratorHTML;

Route::get('barcode-blade', function () {
    $generatorHTML = new BarcodeGeneratorHTML();
    $barcode = $generatorHTML->getBarcode('0001245259636', $generatorHTML::TYPE_CODE_128);

    return view('barcode', compact('barcode'));
});

File: resources/views/barcode.blade.php
<!DOCTYPE html>
<html>
<head>
<title>Generate Barcode in Laravel 11</title>
<link href="https://cdn.jsdelivr.net/npm/bootstrap@5.0.2/dist/css/bootstrap.min.css" rel="stylesheet" crossorigin="anonymous">
</head>
<body>
<div class="container">
<div class="card mt-5">
<h3 class="card-header p-3">Barcode Generation Example</h3>
<div class="card-body">
<h3>Product Code: 0001245259636</h3>
{!! $barcode !!}
</div>
</div>
</div>
</body>
</html>In this example, the barcode is displayed within a styled card component using Bootstrap. This approach works well for creating printable product or inventory lists.
With these steps, you should be able to add barcode generation functionality to your Laravel 11 application for both display and storage purposes. Feel free to experiment with different barcode types provided by the picqer/php-barcode-generator package, such as TYPE_CODE_39, to suit your project’s needs.
Output